Preparing Your Nails
Starting with a clean canvas is essential when attempting any form of nail art. Begin by thoroughly cleaning and drying your nails to remove any oils or residue. Shape your nails as desired, ensuring the edges are smooth to prevent catching and tearing, which could distort your beautiful art designs later on. Next, apply base coats, as they are crucial in protecting your nails from staining and helping the gel polish adhere better. This foundation layer also ensures that your colorful designs have a uniform surface to cling to, and a regular white base could also amplify the vibrancy of the watercolor effect significantly.
Applying a white base is particularly pivotal if you aim for an authentic watercolor appearance. The regular white base acts as your paper-like background, crucial for watercolor painting, which significantly impacts how the translucent layers of color will interact and illuminate. After your base coat cures under the UV/LED lamp, a matte topcoat could also be applied over the white base. This provides a slightly textured canvas which allows the gel polish colors to spread and blend more organically as they would on paper, making watercolor designs more authentic-looking.
Required Materials
Here’s a quick rundown of the essential materials you will need:
- Gel base coat and top coat
- A range of colored gel polishes
- A regular white gel polish for the base
- Art brushes and dotting tools
- UV or LED curing lamp
- Cleansing wipes and nail cleanser
- Matte gel topcoat (optional)
It’s crucial to choose quality materials to achieve professional and long-lasting results. Don’t skimp on cheap gel polishes as they could impact the longevity and clarity of your art design. Investing in high-grade art brushes will also make a significant difference in the precision and detail of your watercolor designs. These supplies are readily available at most beauty or nail supply stores, and numerous online retailers offer high-quality options that are used by professional nail artists.
Step-by-Step Watercolor Technique
The process of creating your watercolor nails begins with the application of the base color. To bring your watercolor designs to life, start with a thin and even layer of a regular white base coat. A white base ensures the colors you choose will pop and exhibit the whimsy and transparency associated with watercolor paintings. Cure the white base under a UV or LED lamp according to the manufacturer’s instructions to ensure it’s completely dry before proceeding.
To approach the creation of the watercolor effect, bear in mind that less is more. Begin by applying small dots or short strokes of your chosen gel polishes onto the nails. A good tactic is to place a drop of the gel on a palette (or foil) and dilute it with a tiny bit of isopropyl alcohol which makes the gel behave more fluidly.
| Step | Description |
|---|---|
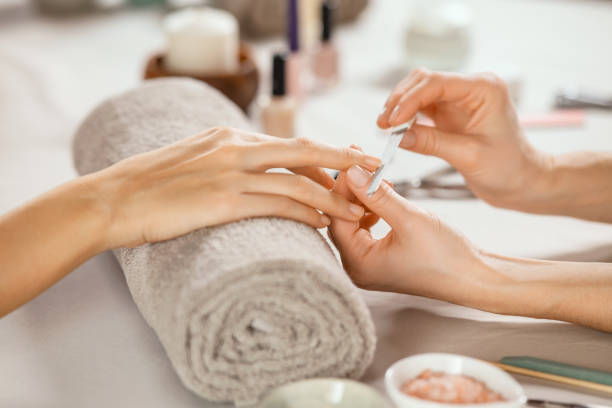
| Step 1 | Prepare your nails by cleaning them and shaping them to your desired length and style. |
| Step 2 | Apply a base coat of gel polish and cure it under a UV or LED lamp according to the manufacturer’s instructions. |
| Step 3 | Choose your desired watercolor shades and apply a thin layer of each color onto a palette or a plastic surface. |
| Step 4 | Using a fine-tipped brush or a toothpick, lightly dab the brush into one of the watercolor shades and gently apply it onto your nails in a random pattern. |
| Step 5 | Repeat step 4 with the other watercolor shades, blending them together on your nails to create a watercolor effect. |
| Step 6 | Allow the watercolor design to dry for a few minutes, then apply a clear gel top coat to seal in the design and add shine. |
| Step 7 | Cure the top coat under the UV or LED lamp for the recommended time, then wipe away any sticky residue with rubbing alcohol. |
| Step 8 | Finish with a cuticle oil or moisturizer to hydrate the skin around your nails. |
Sealing the Design
Once you are satisfied with your watercolor nails, it’s time to seal the design. A top coat is crucial for protecting your art and giving it a glossy, finished look. Apply a generous amount of the top coat to each nail, taking care not to smudge your watercolor art underneath. It’s worth mentioning here that a top coat does not only add shine but also longevity to your nails art. Gel top coats tend to be much more durable than those of regular polish, meaning your beautiful watercolor nails will last without chipping or fading. Cure the top coat under the UV/LED lamp according to the cure time listed on the product, ensuring that your nails are fully set and ready to be shown off.
Aftercare and Maintenance
Just like any other gel manicure, watercolor nails require a level of aftercare to maintain their beauty. While the gel seals in the design and offers protection, your nails still face daily strains that could challenge the art’s durability. Remember to wear gloves while cleaning or doing dishes, and avoid using your nails as tools to prevent any premature lifting or chipping. Regular use of cuticle oil will not only keep your nails and skin nourished but could also help in keeping the gel from becoming brittle. If you notice any peeling or lifting at the edges, resist the urge to pick at it. It’s better to visit a professional or perform a proper removal at home to prevent damage to the natural nail.
Troubleshooting Common Issues
Even the most experienced nail artists can encounter issues when creating watercolor designs with gel polish. To counteract smudging, ensure that each layer is fully cured before proceeding to the next step. If the gel polish does not cure properly, it could lead to an undesired tacky finish, compromising the overall effect. This often boils down to the type of lamp you’re using or the quality of your gel polish. High-quality lamps emit consistent UV or LED light that ensures even curing, a crucial factor in nail art. Additionally, if new to the technique or experimenting with art designs, keep in mind that practice makes perfect. Don’t be disheartened by initial mistakes; they’re simply learning curves leading to your next nail art masterpiece.
Conclusion
Mastering the technique of watercolor nails with gel polish is an artistic endeavor that elevates your nails art to new heights of elegance and sophistication. By meticulously preparing your nails, selecting the right materials, and carefully applying gel polishes, you can create enchanting, ethereal designs that are both eye-catching and long-lasting. The beauty of this technique lies in its blend of simplicity and creativity – the designs are straightforward to apply with a bit of practice, yet the outcome is impressively intricate.
Encouraging experimentation is essential, as each attempt teaches you more about the behavior of gel polishes and how they interact with different base coats and topcoats. Whether striving for ombre nails, delicate floral patterns, or abstract art designs, the possibilities for watercolor designs are limitless. With each brushstroke, you’ll find new ways to express your creativity and refine your skills.
Remember, your nails are your canvas, and gel polish is your paint – so don’t be afraid to create the art that represents you. Embrace the challenge, enjoy the process, and take pride in the unique watercolor masterpieces at your fingertips.
FAQ
- Q1: Can watercolor nail designs be achieved with regular nail polish? A1: Yes, watercolor designs can be done with regular nail polish, but the technique and outcome may differ. Regular polish is more prone to chipping and does not last as long as gel polish. However, the blending and washing effects can still be mimicked to a degree.
- Q2: How long does it take for watercolor nails to dry and cure? A2: The drying time for watercolor nails depends on the type of polish and curing lamp used. Gel polish typically cures under a UV or LED lamp in around 30 seconds to a minute per layer. Always check the manufacturer’s instructions for precise curing times.
- Q3: Do you need any special tools to create watercolor nails with gel polish? A3: Special tools are not strictly necessary, but they can help achieve more precise and intricate designs. Art brushes, dotting tools, and a palette for mixing colors are recommended for creating detailed watercolor effects.
- Q4: How can I prevent the colors from blending too much and losing the watercolor effect? A4: Control the amount of alcohol used when thinning out the gel polish and work in small sections so that colors don’t run into each other unintentionally. Curing in between layers can also help maintain separate colors and prevent over-blending.
- Q5: Is it possible to remove watercolor nails with regular nail polish remover? A5: When using gel polish for watercolor nails, regular nail polish remover will not be effective. Gel polish requires a gel-specific remover or acetone to break down the product for safe removal. It’s also advisable to follow proper removal techniques to protect the natural nail.