Introduction to Maybelline Eraser Concealer
What is Maybelline Eraser Concealer?
Maybelline Eraser Concealer is a revolutionary product designed to provide an instant fix to make your skin look radiant and refreshed. Its promise of good coverage, without the heavy feel that does not settle into fine lines, sets it apart. The concealer directly targets dark circles, swelling, and fine lines, offering an instant transformation for those who long for youthful, bright-looking eyes.
Why Choose Maybelline Eraser Concealer?
Of all the concealer options available, why gravitate towards Maybelline’s? Firstly, for its incredible ease of use, thanks to the unique design of the sponge applicators. These micro-correcting applicators allow for precise product placement and seamless blending. If you’re using concealer for the first time or a seasoned pro, this feature is a game-changer in achieving that impeccable under-eye coverage. It could also be said that its variety of shades that cater to various skin tones makes it inclusive and versatile.
| Reasons to Choose Maybelline Eraser Concealer |
|---|
| 1. Excellent coverage for dark circles and blemishes |
| 2. Easy to use applicator for precise application |
| 3. Lightweight formula that blends seamlessly into the skin |
| 4. Long-lasting, staying put throughout the day |
| 5. Available in a variety of shades to match different skin tones |
Getting Started with Your Concealer
Selecting the Right Shade
Choosing the correct shade is critical. If you use a concealer that’s too light or too dark, the area you’re covering is visible rather than concealed. A good rule of thumb is to select a shade that’s one lighter than your foundation for the under-eye area. If you’re dealing with very dark circles, opting for shades lighter or even the lightest shade might be necessary. Here’s a quick guide to help you choose:
- For dark circles: Choose a shade that’s at most two shades lighter than your skin tone.
- For blemishes: Match the shade to your foundation for seamless coverage.
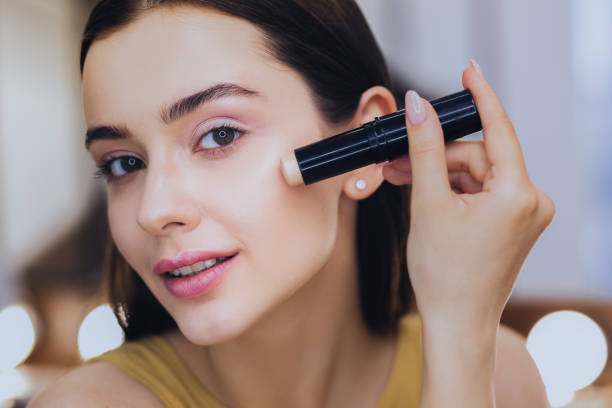
Understanding the Applicator
Maybelline’s Eraser Concealer comes with a built-in sponge applicator, designed for a clean touch and to move smoothly across the contours of your eye area. Before using for the first time, you need to twist the collar of the applicator in the direction of the arrows until the product is visible on the sponge. Once primed, you’re ready to go.
Step-by-Step Application Guide
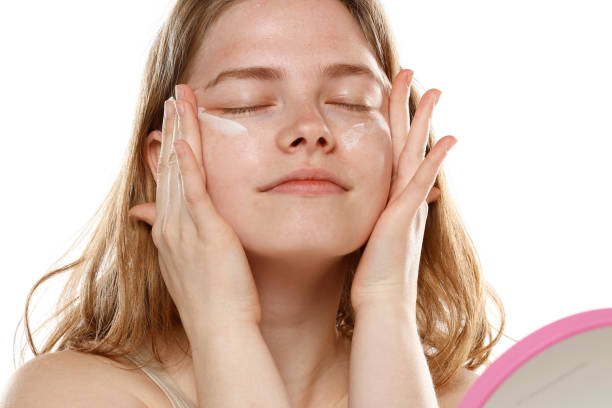
Preparing Your Skin
A crucial part of concealer application that often gets overlooked is skin preparation. Start with a clean and moisturized face, ensuring the under-eye area is well-hydrated to prevent the concealer from caking. Applying an eye cream can be beneficial, as it creates a smooth base and can help with long-term care.
Applying the Concealer
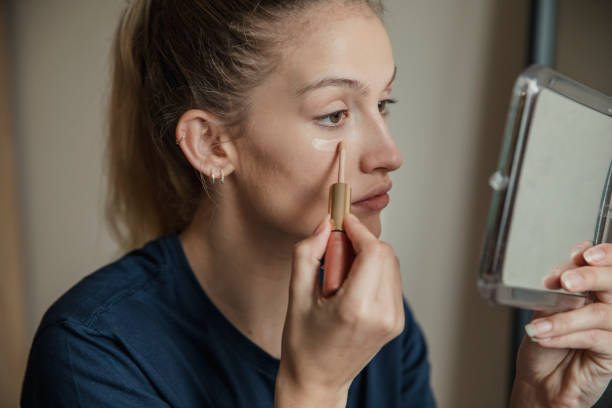
Under the Eyes
For those dark under-eye circles, apply the concealer directly in an inverted triangle shape to not only cover the dark area but also to lift and illuminate the whole eye area. This method helps redirect light to make the face appear more youthful and refreshed.
Blemishes and Spot Coverage
With blemishes, the trick is precise, targeted application. Take a small amount on the tip of the sponge and dab onto the blemish. Avoid rubbing or spreading to keep the good coverage localized.
Contouring and Highlighting
The concealer can also be used for light contouring. Using a shade or two darker for shadowing and a lighter one for highlighting can redefine your facial features subtly. Always blend well to avoid harsh lines or streaks.
Blending for a Flawless Finish
Blending is absolutely key in avoiding that dreaded caked-on look. Use the sponge applicator to pat the product gently into the skin. For larger areas or a more seamless blend, you could also use a makeup sponge or a brush. Make sure that there are no visible lines or patches where the concealer starts or ends.
Up next, we’ll expand on tips and tricks for using your Maybelline Eraser Concealer effectively.
Tips and Tricks for Maybelline Eraser Concealer
Setting Your Concealer
After applying and blending your concealer, setting it is crucial to prevent it from creasing or sliding out of place. Here’s how to ensure it stays put:
- Lightly dust a translucent setting powder over the concealed areas using a fluffy brush. This locks the concealer in place.
- If you prefer a luminous finish, you could also opt for a light-reflecting powder, which will set your concealer while also brightening the area.
Longevity Throughout the Day
For those long days when you need your makeup to last, the staying power of your concealer is of the essence.
- Use a long-wear or waterproof concealer formula for extra resilience.
- Regular touch-ups can be a lifesaver. Keep a mini version of your concealer or a compact powder in your purse for quick fixes.
Fixing Common Mistakes
Even seasoned makeup users can make mistakes, but the good thing is they are fixable. If you find that your concealer is creasing, lightly tap the area with your finger or sponge to smooth it out. If it feels too heavy, try pressing a tissue on the area to lift off excess product. Remember, less is often more with concealer, and buildable coverage is your friend.
Maintaining Your Maybelline Eraser Concealer
Cleaning the Applicator
Keeping your sponge applicator clean ensures that your product goes on smoothly and keeps skin breakouts at bay. Gently clean the applicator with lukewarm water and mild soap. Allow it to air dry completely before using it again.
When to Replace Your Concealer
The lifespan of a concealer isn’t indefinite. Generally, it’s good practice to replace your Maybelline Eraser Concealer every six months, as the product can gather bacteria over time, which could be harmful to your skin. If you notice any change in the consistency, smell, or color of the product, it’s time for a new one.
Conclusion
Mastering the use of Maybelline Eraser Concealer can truly elevate your makeup routine, offering a solution to dark circles, blemishes, and more, while also lending itself to techniques like highlighting and contouring. With the appropriate shade, proper application, and regular maintenance, it can provide pristine coverage and enhance your beauty look with ease. Remember that makeup is an art, and practice alongside these tips will render you an expert in no time.
FAQs
Q: How do I know if I’ve chosen the right shade of Maybelline Eraser Concealer?
A: If your concealer blends seamlessly with your foundation and effectively covers dark circles without drawing attention to the area, you’ve likely chosen the right shade. It should be one shade lighter than your foundation for the under-eye area and an exact match for covering blemishes.
Q: Can the Maybelline Eraser Concealer be used for contouring?
A: Yes, you can use a darker shade to contour and a lighter shade to highlight. Just ensure you blend thoroughly for a natural look.
Q: How should I blend the concealer for the best results?
A: Use a patting motion with the sponge applicator, a brush, or even your fingertips. The key is to press the product into the skin rather than rubbing it, which can cause it to move around or settle into fine lines.
Q: How often should I clean the sponge applicator and how?
A: It’s best to clean the sponge after every few uses to prevent product buildup. Use lukewarm water and a gentle soap or shampoo to clean, then squeeze out the excess water and let it air dry.
Q: What do I do if my concealer starts to look cakey during the day?
A: Lightly dab at the affected area with a damp makeup sponge to thin and smooth out the excess product. If the area is dry, a small dab of moisturizer can help to blend the product more seamlessly.